Mouse Control for iOS A New Era of Accessibility
Research article  Open access |
Available online on: 20 January, 2020 |
Last update: 28 October, 2021
Open access |
Available online on: 20 January, 2020 |
Last update: 28 October, 2021
During Apple’s latest launch of iOS 13, the name given to the operating system used on iPhones and iPads, little was mentioned of Mouse Control. The new feature was buried amongst a slew of new upgrades that the technology manufacturer found to be more significant, despite the tremendous impact that Mouse Control would have on the lives of People with Disabilities (PWDs) to use touch screen devices.
From Apple’s perspective, the introduction of Mouse Control came as part of a concerted effort to position iPads and iPhones as viable replacements for desktops and laptops; an option that has become tangible with the increase of processing power and functionality of the mobile devices. For PWDs, the integration of Mouse Control functionality came after considerable lobbying of Apple to make this feature available on their mobile devices so that people with physical disabilities can use the devices with more freedom.
Unlike Apple, Android devices have supported full mouse control functionality as a built-in feature for many years, making devices that use the Google operating system a go to choose for people with fine motor skill difficulties. By activating Mouse Support functionality through iOS Assistive Touch, Apple’s centralized accessibility features button, users can connect any Bluetooth mouse to replace the need for touch as a means of navigating the device.
As with all accessibility features, they are beneficial to all, and not just to PWDs. The Mouse Support feature makes use of iPads and iPhones easier for everybody. It’s no different from someone using the Magnifier to zoom in on a finely printed restaurant menu or using Type to Siri in order to quietly give commands in a messages-like environment. Accessible design is a good design that benefits everyone.
iPadOS 13: How to use a mouse with your iPad
- Open Settings, then choose Accessibility
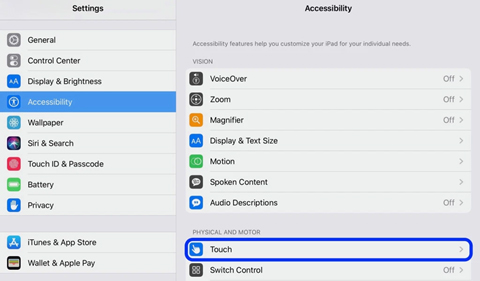
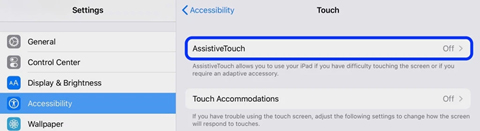
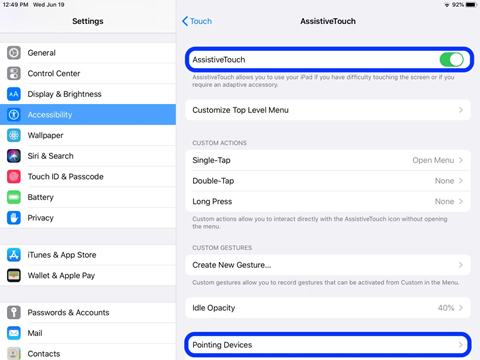
- Next tap Touch then AssistiveTouch and toggle it on
- Below tap Pointing Devices
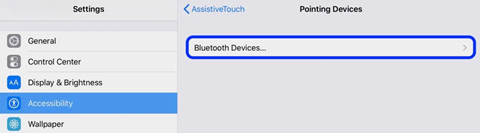
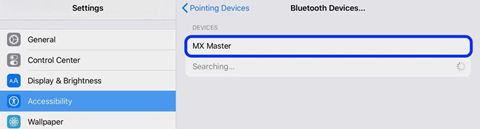
- Make sure your Bluetooth mouse is turned on and is discoverable. Tap Bluetooth Devices… to start the pairing process.
- Tap your mouse when it appears in settings.
- Confirm the process when prompted.

- When Assistive Touch is turned on and a mouse is paired, your iPad will show a circular cursor like below:
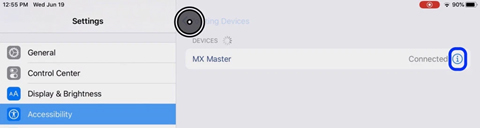
- As shown above, click or tap the “i” to customize your mouse buttons.
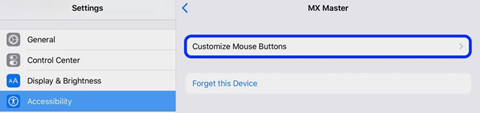
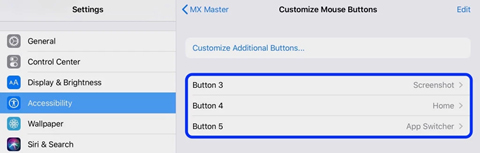
- Now choose Customize Additional Buttons…
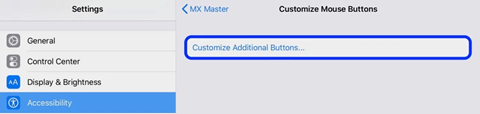
- iPadOS will have you click the mouse button you’d like to customize, then choose your preferred shortcut.
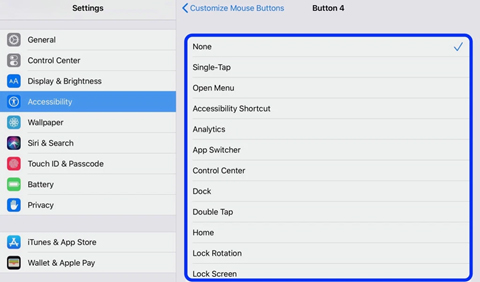
- iPadOS supports multiple shortcut buttons, depending on the mouse you’re using.
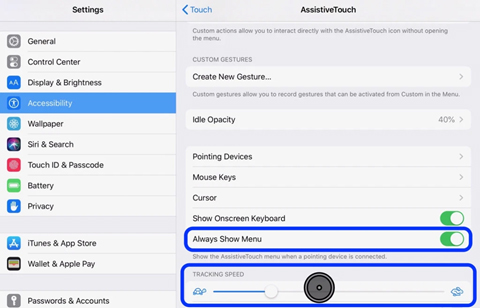
- Back under the main AssistiveTouch settings, you can adjust the tracking speed of your mouse from your iPad as well as opt to turn off the default AssistiveTouch menu icon.
You can similarly follow the same steps in order to use a mouse with an iPhone with iOS 13.